Do You Have A Construction Project We Can Help With?
Read This Before You Finish Your Basement
Even if it’s currently cold concrete and crammed with boxes of off-season duds, the lowest floor of your home probably has loads of potential.
How to Create the Perfect Bonus Room
Even if it’s currently cold concrete and crammed with boxes of off-season duds, the lowest floor of your home probably has loads of potential. Treat it just as you would any of the rooms aboveground, and it might just become the most popular spot in the house—for a lot less cash than adding on. Here’s our bottom-line advice for turning this underutilized space into a place you’ll be eager to spend time in.
The Layout Puzzle: Where to Begin
a) Put the main socializing area in a spot that gets the best natural light, to draw people in.
b) Bedrooms need a window for egress, so they’ll need to be located at the perimeter.
c) The TV-viewing zone can be in a darker spot, to reduce glare and create a home-theater feel.
d) Store snacks and beverages in an area you can access without crossing in front of the TV.
What to Inspect (and Fix) Before You Start
- Test for moisture by taping 2-foot squares of plastic sheeting to the floor and walls. Wait a couple of weeks. If condensation forms underneath, your foundation’s not sealed. If droplets form on top, your basement needs dehumidifying.
- Use an awl to probe for rot and insect damage in floor joists, rim and header joists, the sill plate, and wood-framed windows.
- Check floor joists for sagging by climbing a ladder until you’re nearly eye level with the underside of the joists. Look across them (perpendicular to their direction) to see if any are out of line.
- Have a pro check fuel-burning equipment and your house’s ventilation system to ensure that you won’t have carbon monoxide buildup below grade.
Will You Need More Headroom?
Many codes call for 7 to 7½ feet of clearance. If you don’t have that height, you may be able to dig out and lower the concrete floor, but it’s a complex, pricey job. Ask your contractor if moving ducts and pipes might solve the problem.
Double Up on Sump Pumps
It’s best to have both a battery backup for your main pump, in case of a power outage, and a second pump, in case the first one gives out. If your house is hooked up to a municipal water supply, invest in a water-powered backup pump that’s juiced by pressure in the supply line.
DIY Waterproofing
Minor leaks may not need the attention of a pro. “Often a few simple fixes will solve a moisture problem,” says This Old House general contractor Tom Silva. His tips:
• Install diverters to send gutter water at least 10 feet from the foundation.
• Slope soil away from the foundation.
• Seal small cracks or gaps around pipes with concrete-patching compound.
• Fill larger cracks inside and out with hydraulic cement, which expands as it cures. A structural engineer should inspect any cracks that are wider than a pencil.
Insulate Pipes Before Boxing Them In
While they’re exposed, slip foam insulation sleeves over hot-water pipes to prevent heat loss and over cold-water ones to prevent condensation from dripping on the inside of the drywall or ceiling.
Secrets to Success for Building Basement Walls
Fix moisture problems first, then follow our pro tips on methods and materials.
Banish mold—ban standard drywall
It just doesn’t belong below grade; mold can grow on the paper coating, and the gypsum core can crumble. Try USG’s Sheetrock Brand Mold Tough Gypsum Panels or Georgia-Pacific’s nonpaper-faced DensArmor Plus High-Performance Interior Panels. Both got the highest scores on a standard lab test for mold resistance.
Finishing Foundation Walls: Insulated Stud Walls
Best for: Avid DIYers on tight budgets
How it’s done: It’s the tried-and-true traditional method: A vapor barrier and rigid-foam insulation are laid over foundation walls, followed by a stud frame and drywall.
Finishing Foundation Walls: Interlocking Panel Systems
Best for: DIYers who want to save labor and floor space
How it’s done: Notched insulation panels are fitted together and glued, clipped, or screwed to foundation walls. Then drywall is attached to integrated strips, resulting in a thinner wall.
Finishing Foundation Walls: Professional Basement Refinishers
Best for: Non-DIYers
How it’s done: Licensed pros install a proprietary modular system that combines insulation, finished wall panels, and sometimes ceilings, floors, and finishes. Some types are attached to a level track, so they go up quickly.
If You Want to Add Partition Walls
a) Put them in sparingly. Too many below-grade rooms will feel like a rabbit warren.
b) Place them between columns to turn support posts into design elements.
c) Build half-wall dividers or walls with window cutouts so that light can penetrate the interior.
d) Make them mobile. Sliding doors and movable screens can be closed for privacy as needed.
Leave Space Around Mechanicals
Whether you’re moving equipment or boxing it in, heed the advice of TOH plumbing and heating expert Richard Trethewey: “Make sure a real human being can fit around mechanicals for upkeep.” Plan on 2 to 3 feet of clearance.
The Best Flooring to Use If You’re Worried About Moisture
A high-tech printing process gives scratch-resistant floating vinyl planks a wood-like appearance that’s so realistic you might do a double take. And the 20-year warranty will give you peace of mind.
Want a Hung Ceiling for Plumbing Access?
Ceiling tiles have gotten a huge face-lift in recent years, so your basement need not look like a bland boardroom. You’ll need a few extra inches of headroom to hang the grid; ask the manufacturer.
Keep the Racket Down Below
a) To soundproof the ceiling, add fiberglass batts without a vapor barrier between the joists. Then fasten one or two layers of drywall to them, using resilient clips and metal furring channels (called hat channels, for their shape). This isolates the drywall from the joists, eliminating vibration and thus minimizing sound travel.
b) Place mechanical equipment on top of sound-dampening antivibration mats or pads.
c) Minimize connections between ducts in the basement and upper floors to reduce noise transmission.
Don’t Skimp on Lighting
A dim basement is a real turnoff, so you’ll need more fixtures than you’ve got elsewhere. Recessed cans broadcast light in a cone shape that’s wider at the base; if you’re using them, space them closer together to avoid dark spots. A good rule of thumb: Divide the ceiling height by 2 to get the maximum distance between cans.
Better-Looking, Safer Window Wells
Skip the corrugated metal and go for prefab wells made from fiberglass or another faux-stone material. Top them with grates or plastic covers so that people can’t fall in, but make sure the toppers can be removed easily by a young child to ensure emergency egress.
Fix a Staircase That’s Out of Code
Sometimes a finished basement floor makes the bottom stair a little too shallow, throwing off the whole run. Tom Silva’s fix: Measure the rise of each step. If any are shorter than 7 inches, you can remove the treads and add spacers to pad them out as you go up. Just keep heights below code maximum, and make sure they don’t differ in height by more than ⅜ inch.
Make Room for Food
You don’t need a full kitchen. But you’ll get plenty of mileage from a mini fridge for beverages, a cabinet to hold snacks, and a microwave for heating leftovers or making popcorn for movie nights. Keep a tray handy for stacking and transporting dirty dishes upstairs.
Save Space for Play
• Game tables eat up a lot of square footage. For a small pool table (3½ feet by 7 feet), you need a clear space at least 11½ feet wide by 14½ feet long to play comfortably—if you buy the shortest cues, that is. A tournament-size pool table (4½ feet by 9 feet) or a 5-by-9 Ping-Pong table needs even more room. Unless you’re positive you’ll use it a lot, consider skipping a single-activity table.
• An all-purpose worktable can seat several people for crafts, puzzles, board games, and much more—and designers say it’s often a better draw for crowds than a game table.
• Today’s video games involve actual physical activity, not just fiddling with a joystick. Check your gaming platform for recommended clearances around and above the console. (No one should break a bone playing a virtual version of any sport.)
• Wall-to-wall carpet is a good choice to deaden sound in a play area. Opt for synthetic fibers that resist mold and mildew.
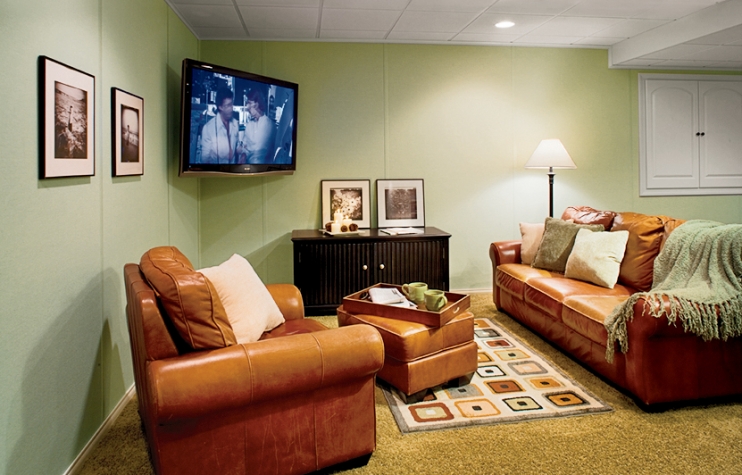
Five Smart Ideas to Steal from this Basement
It’s so cheery and welcoming, you hardly know you’re on the bottom floor.
1. Dress up the walls.
Tall wainscot gives the space a homey vibe while saving the drywall from dings
and dents.
2. Be smart about storage.
Built-ins near a walk-out entry have room for coats and boots. Positioned to hug the stairway, they save space.
3. Layer on lighting.
Traditional wall sconces add charm in a basement, where can lights usually prevail. Here, a warm bronze finish and white shade complement the surrounding woodwork.
4. Build a better stair.
The first-floor door was removed to let sunlight spill downstairs. A handsome handrail and newel post were finished to match the built-ins.
5. Channel natural light.
Take every opportunity to brighten up closed-off rooms. A reeded-glass light on the bathroom door fosters an airy feeling inside but still permits privacy.
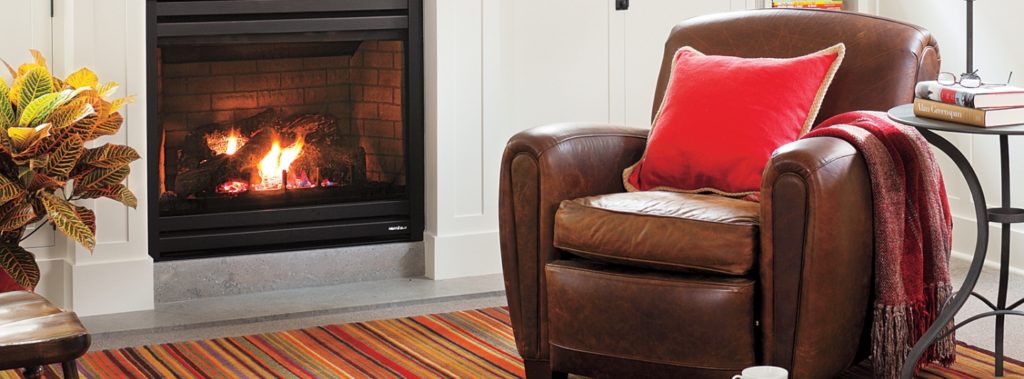
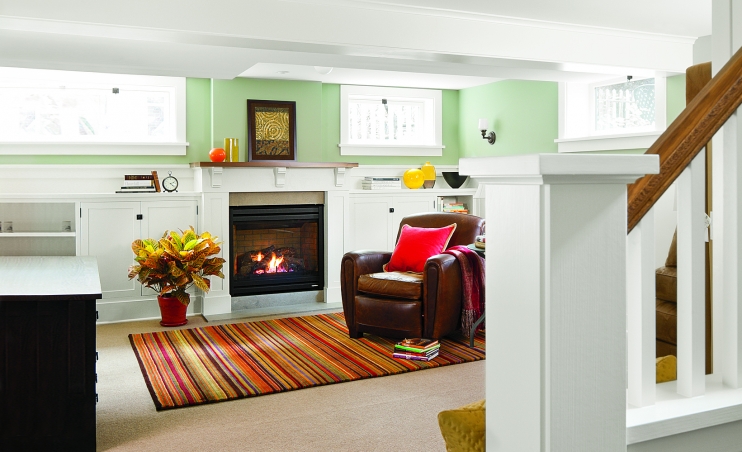
Up the Cozy Factor
You don’t need an oversized sectional to create a comfy place to curl up.
1. Put a fireplace front and center.
A direct-vent gas unit lets you avoid lugging firewood downstairs.
2. Make hopper windows less basement-like.
Built-in cabinets beneath them act as a visual anchor, making their high placement seem just right. And they gain substance and polish from crisp trim, deep sills, and bronze latch closures.
3. Use furnishings to set the tone.
A leather chair and colorful textured accessories warm up a light, airy space.
Tip: Make sure temps stay toasty.
A chilly basement will chase people away faster than you can say “brrrr.” Give it a separate thermostat, and put supply registers near the floor, not the ceiling. If you need supplemental heat, try electric baseboards or radiant mats.
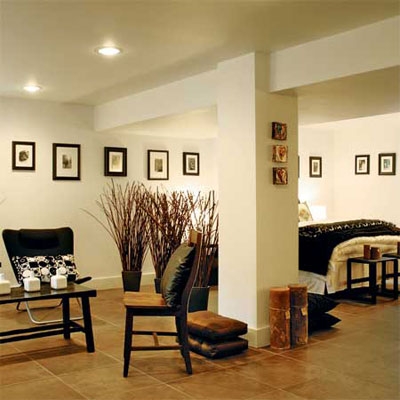
Tips for a Beyond-the-Basic Bedroom
Make a narrow room (like this one, only 7½ feet wide) feel snug, not suffocating.
1. Build a spot for the bed.
Instead of aligning the full-size bed with the room’s long axis, it was turned 90 degrees and tucked below the window for a perfect fit.
2. Keep storage compact.
The bookshelf doubles as a headboard and nightstand; deep drawers hold clean linens and give guests room to unpack.
3. Continue details from adjacent spaces.
Here, the wainscot ties the sleeping nook in with the rest of the rooms.
4. Layer rugs for warmth.
An area rug laid on top of rugged wall-to-wall carpet adds welcome texture and softness underfoot.
5. Add wall fixtures.
A swing-arm reading lamp saves space and directs light right where it’s needed; sconces flanking the high window draw the eye upward.
If You’re Adding a Bath…
A few simple guidelines will make it functional and eye-catching.
1. Go for light-reflecting finishes.
We love this can’t-fail combo of traditional white fixtures, a painted medicine cabinet, and shiny chrome hardware with porcelain accents.
2. Don’t risk an overflow.
Have a plumber install a backflow-prevention valve on your main drain line to prevent backups into below-grade sinks or tubs.
3. Get rid of humid air.
Extra moisture is the last thing a basement needs. Add a humidistat to your bath’s exhaust fan that will automatically turn it on when the air’s too damp.
4. Minimize pipe runs.
Here, the sink, tub, and toilet share the same wall, which simplifies plumbing installation and keeps costs down.
5. Handle wastewater properly.
A full, below-grade bath needs a sewage ejector system with a tank and pump. For a half bath, consider a macerating toilet, whose compact tank can handle the sink and john.
Make Double Duty Rooms Work Hard
Functional spaces need not be fancy, but they shouldn’t be an afterthought.
1. For a small entry area, skip the coat closet.
Wall hooks and a bench get the job done without eating up much floor space.
2. Opt for easy-care, durable flooring.
Large-format tile has fewer grout lines, and a dark color disguises dirt.
3. Use stackables for a compact laundry.
Double-decker machines have a small footprint, leaving room for a sink area with open shelving, where you can treat stains and store cleaning supplies.
Four Handy Things to Have Around When It’s Done
1. A rechargeable portable light, stored in an easy-to-find spot, in case of a power outage.
2. A cell-phone signal booster so that you can take and make calls below grade.
3. A wireless-network extender so that you can tote your laptop downstairs.
4. A wet/dry hand vacuum in case of small spills or washing-machine snafus.
Article Source: ThisOldHouse
Hey, have you heard the one about the 36-inch pro-style range that ripped the molding off the back door on its way into the house? Or the poured-on-site concrete countertop that cracked three months after installation? Or maybe it was the contractor who was paid in advance, promptly skipped town, and was never heard from again.
Yep, we’ve heard those stories, too. Let’s face it, in a nation where home renovation long ago surpassed baseball as the Great American Pastime, kitchen nightmares are a dime a dozen — and anyone who’s ever traded Formica countertops and a Harvest Gold fridge for soapstone and a stainless steel side-by-side knows exactly what we’re talking about.
Well, misery may love company, but what we all crave is a happy ending—a smart-looking, functional workspace that is a source of comfort, efficiency, and maybe a little neighborly envy (not to mention an excellent Porterhouse). To help you get there, we’ve compiled this handy guide to some common kitchen-remodeling disasters and offer expert strategies for steering clear of them. For each major phase of the job — hiring, planning, budgeting, and living through it — we’ve got an easy 10-point plan to follow. And don’t let our cautionary tales scare you: Take our advice, and your biggest regret when your dream kitchen is complete will be that you didn’t do it sooner.
Finding (and Holding Onto) the Best Pros
Kitchen remodeling is at the top of homeowners’ wish lists. It is also, according to attorneys general across the country, a leading source of consumer complaints. Recommendations from friends are the best place to start your search for a qualified contractor. But before you make a decision, keep these caveats in mind.
Three Truths About Contractors
1. They’re only as good as their last job. “General contractors often win jobs based on their good reputations,” explains architect Dennis Wedlick, author of Good House Hunting: 20 Steps to Your Dream Home. “But circumstances can change. When the contractor switches subcontractors or laborers, quality can be affected.” Ask your top three candidates to supply references, and follow up with the most recent ones.
2. What you see is what you get. In addition to completed renovations, try to visit a job in progress. You can learn a lot about a contractor’s commitment to quality and safety by seeing for yourself how clean the site is and how carefully the drywall is hung and taped.
3. The best ones are worth waiting for. The best contractors tend to be the busiest ones. Build your schedule around the GC of your dreams, not vice versa.
Four Essentials to Ask References
1. What were the contractor’s work habits? Did he show up on time and prepared to supervise the subs?
2. Did he stick to the scope of the work and cleanup plan as outlined in the contract? Were any unauthorized changes of materials or details made?
3. Did your project stay on or close to budget? Did materials arrive on time? Did he keep you up to date on his progress or potential delays?
4. Did anything go wrong? And if so, how — and how quickly — was the crisis resolved?
Three R’s of Keeping the Crew Happy
1. Refreshments: You don’t have to cater three squares a day, but at least offer a thermos of coffee or a cooler with soft drinks. They’ll appreciate it.
2. Responsibility: The crew can’t work efficiently if you’re in the way. Ask questions, but don’t overwhelm them with your TOH-taught smarts. And teach kids and pets the meaning of KEEP OUT.
3. Respect: Say good morning, good night, and good job when appropriate. And, please: Don’t ask if they’ve met any desperate housewives lately. The appliances can be top-of-the-line, the finishes the most expensive around, but if the space doesn’t work, it’s money down the brand-new In-Sink-Erator. Here are 10 ways to arrive at the best design for you, even if—like the vast majority of Americans—you rarely cook a meal from scratch.
Plan the Smartest Layout
Three Things to Bring to Your First Meeting With the Kitchen Planner
An experienced designer can save you time and money by heading off potential problems at the pass. Kitchen planners know all the tricks: how to maximize storage, smart substitutions for high-end materials, even the best local contractors for the job. But first, they need a few things from you.
1. An architectural rendering or to-scale drawing of your existing kitchen, showing the location of windows, doors, heating, plumbing lines, and electrical outlets. If you’re not working with an architect, you can do it yourself with 3-D kitchen design software. (Take a free test-drive at nkba.org, the National Kitchen and Bath Association’s website.)
2. A detailed wish list indicating your goals for remodeling. Do you want more space? More storage? More style? A built-in dog bed? Organize it by priority, from the “must-haves” to the “in our dreams.”
3. An idea folder: pictures of rooms, products, materials, and architectural details that appeal to you; notes on what you like about friends’ kitchens (and hate about your own); and general concepts translated from other areas of your life. Are you a neat freak? Glass-front cabinets are sleek, but you may be happier with painted doors that conceal clutter.
Five Questions to Ask Yourself: A Kitchen Personality Quiz
Repeat this mantra: Form follows function. Answer these questions about the way your household uses the kitchen, then see the analysis below for design ideas.
1. How many chefs usually work in the kitchen?
a. Two, maybe more (including guests and kids).
b. Only one person cooks at a time.
c. None.
2. What’s your cooking style?
a. Serious: Cooking and entertaining at home is how we unwind.
b. Laid-back: Dinner most nights is a casual affair; holidays are when we cook for a crowd.
c. Nonexistent.
3. Who else hangs out in the kitchen, and what do they do there?
a. On weekends the place is party central.
b. The whole family seems to do everything but sleep and play soccer there. It’s a game room, TV room, office, and kitchen all rolled into one.
c. If it weren’t for the beer and microwave dinners, the kitchen would get no use at all.
4. How important is easy cleanup?
a. Not as important as the high-Btu burst I get from unsealed stove burners.
b. The room sees too much activity for surfaces to need coddling. It has to clean up fast.
c. What I really need is a recycling system for paper, plastic, and glass.
5. If you could splurge on one luxury, what would it be?
a. A six-burner Viking range with electric ovens.
b. A built-in computer desk where the kids can go on-line and I can pay bills.
c. Ever hear of a self-cleaning microwave?
The Answers
3 or more A’s: Think like a pro. If it’s in the budget, spend the money on a six- to eight-burner professional- style range, dedicated spice storage, and a fridge spacious enough to accommodate platters. You may also want to consider glass-front cabinets or open shelves to display dishes and glassware. Make sure you have good task lighting and stick to a flooring material like wood or old-fashioned linoleum, which are easy on the feet and easy to clean.
3 or more B’s: Keep it functional, not fussy. Design in features that will simplify your daily routine—a self-cleaning oven, a microwave where the kids can reach it, lots of counter and storage space. Since you rarely cook labor-intensive meals, spend your appliance dollars on an energy-efficient side-by-side refrigerator, an easy-to-clean cooktop, and sturdy cabinetry with ample space for household staples. Think in advance about ways to control the inevitable clutter from all that family activity, such as an adjustable shelving system or cubbies fitted with bins.
3 or more C’s: Remember resale. Spend your makeover dollars on practical, clean-lined cabinets; good-quality basic appliances; and conveniences like a built-in recycling center. Be careful not to spend too little on the kitchen: Quality counts with homebuyers, and a shoddy new kitchen is no better than a dingy old one. It will be money well spent. In the current real estate market, you should be able to recoup between 87 and 125 percent of your investment.
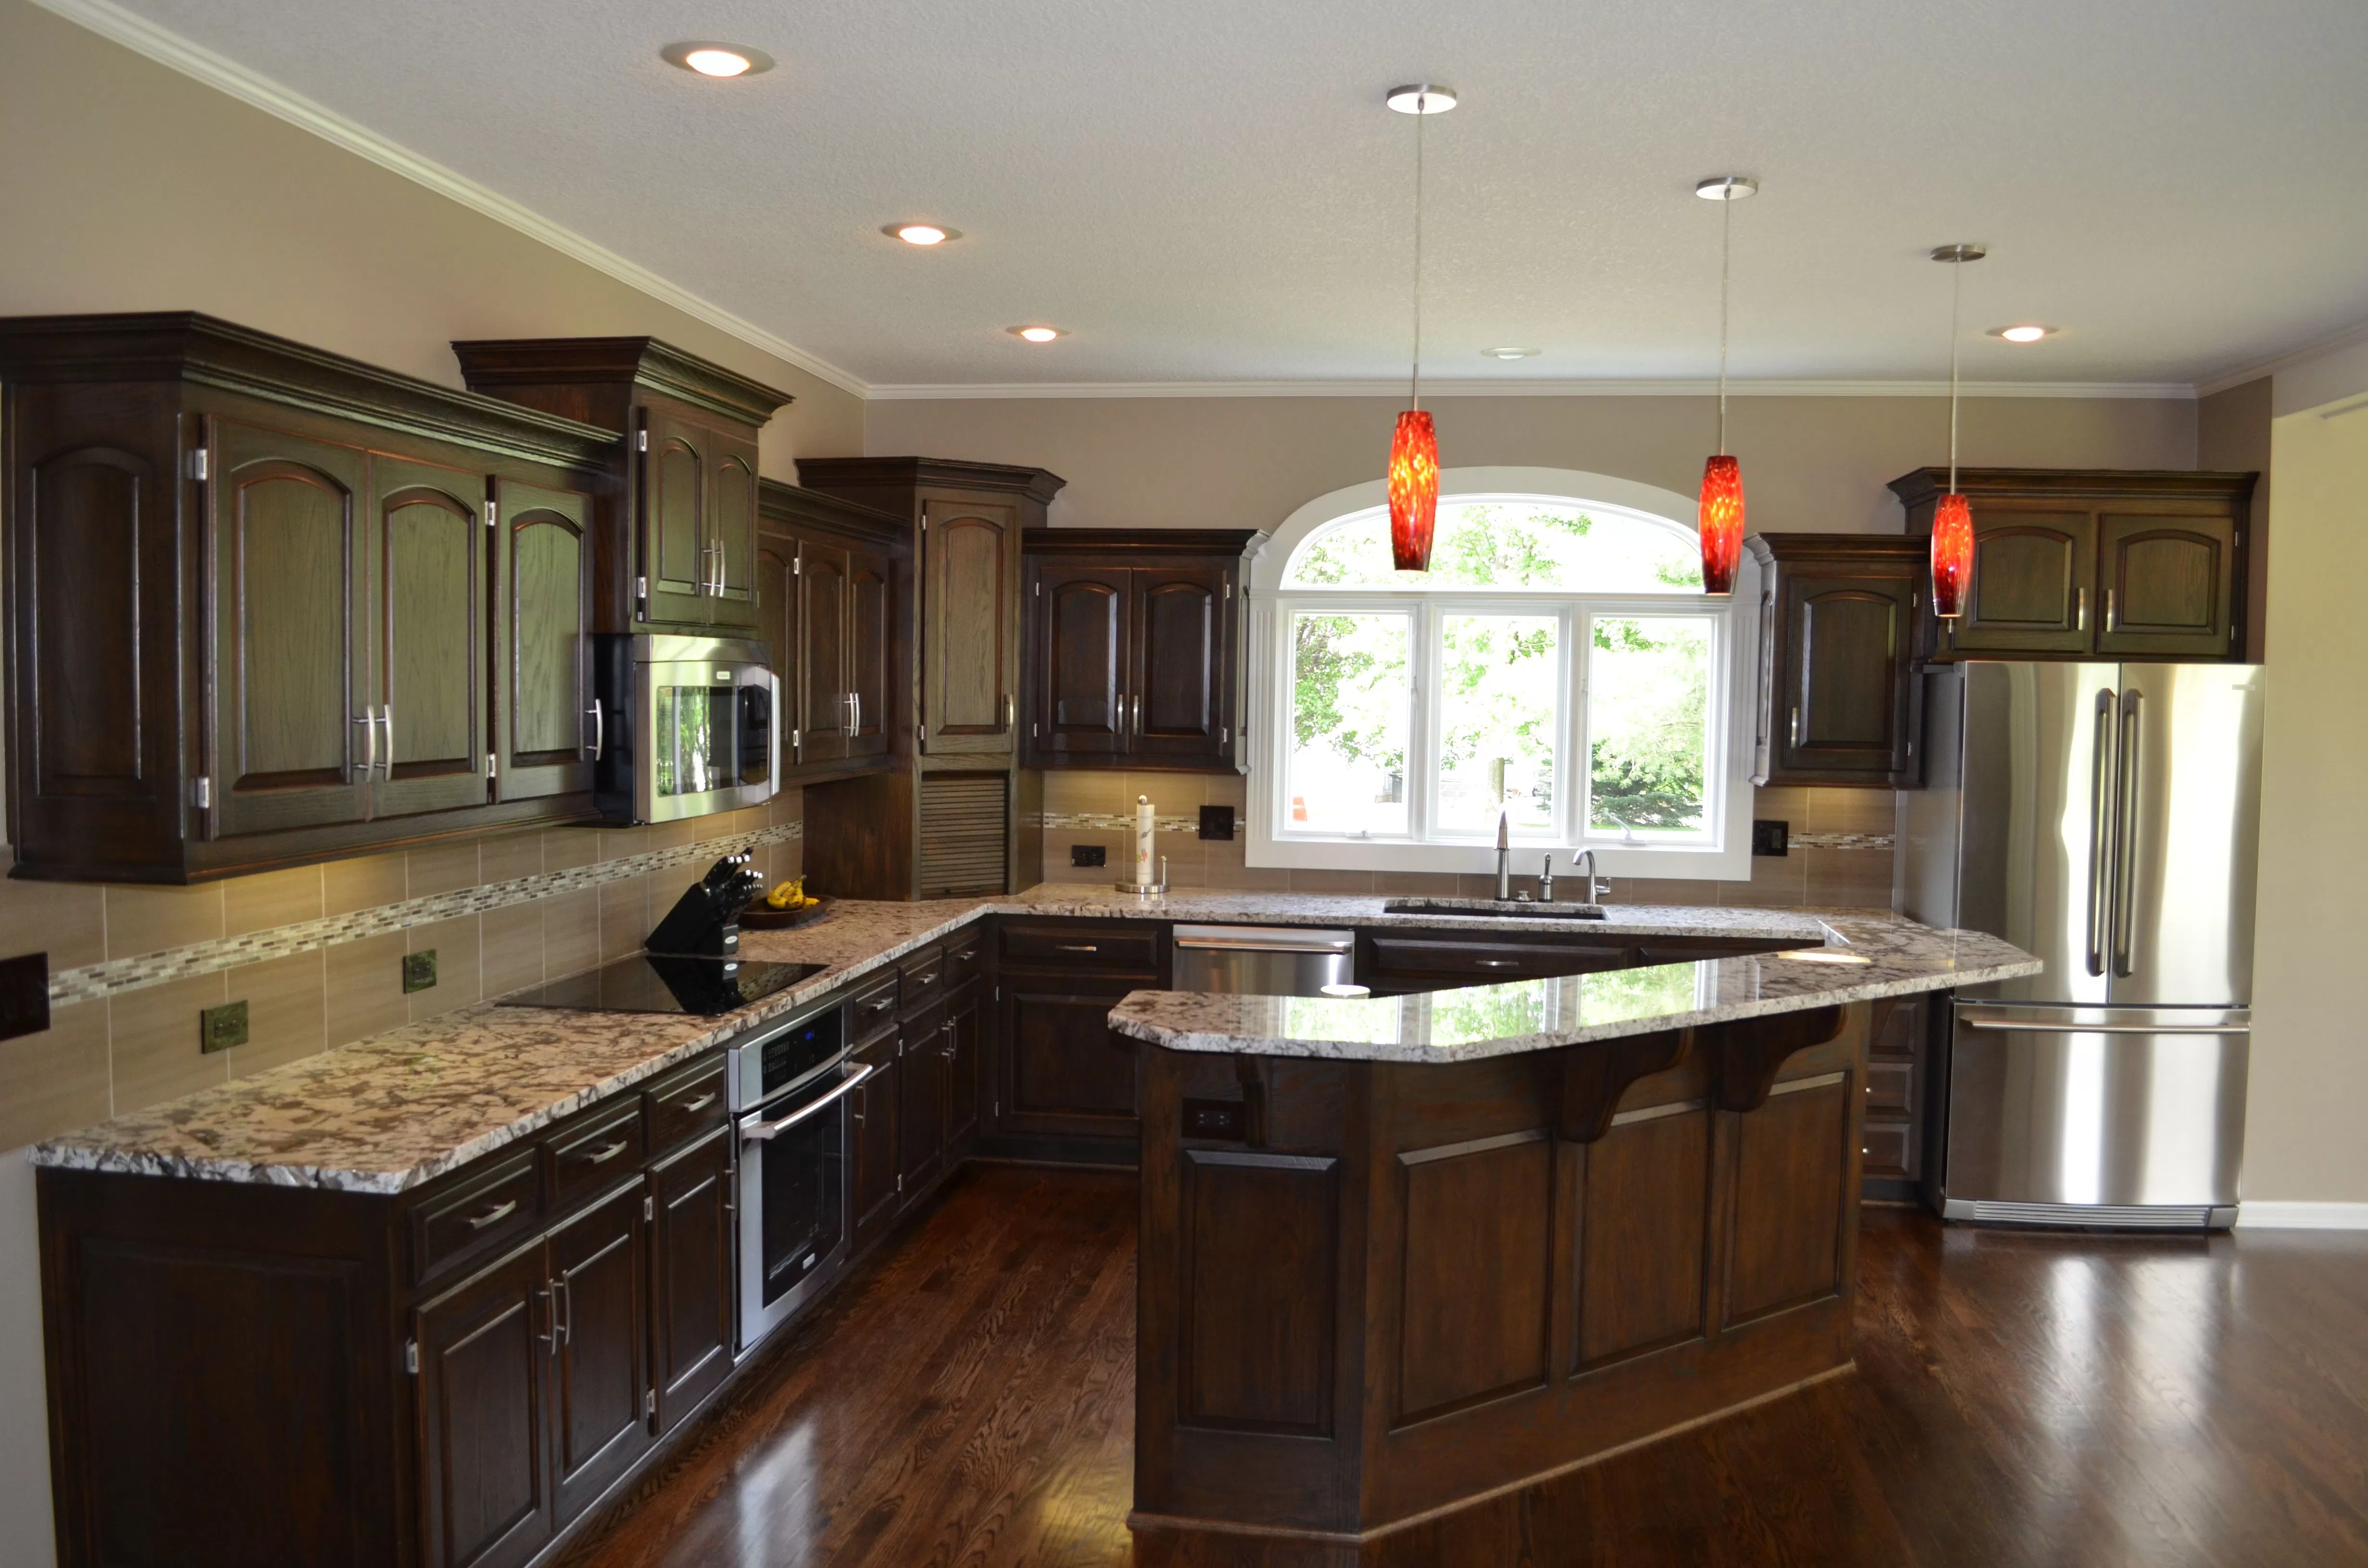
Two Triangles are Better Than One: The Best Layouts for Busy Kitchens
The kitchen triangle — that three-sided connection between the stove, sink, and refrigerator — is practically sacrosanct in kitchen design manuals. But in today’s family kitchens, often one triangle isn’t enough.
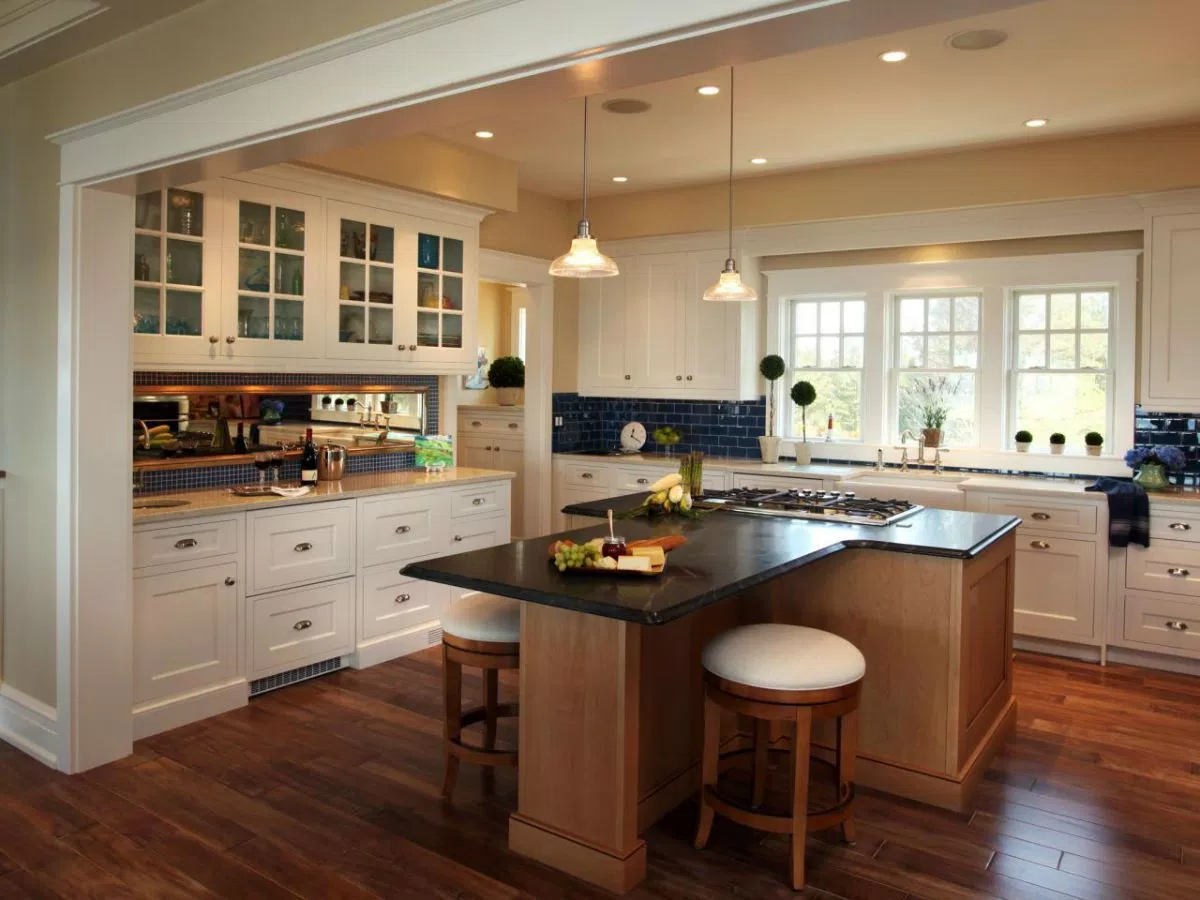
1. The island workstation: Depending on the shape of your kitchen, an island can make the work triangle more efficient — in a large space, it can tighten the legs of the triangle to the recommended distance of between 4 and 8 feet. In a two-cook kitchen, the island can be a pivot point in a series of triangles, especially if it includes a prep sink or a dedicated workstation, as for baking. In a compact kitchen, consider a rolling island that can be tucked against a wall when not in use.
2. The zone approach: Before you settle on a layout, map out the prevalent traffic patterns in the room: for instance, from fridge to sink to stove; toaster to coffeemaker to computer desk; homework station to fridge to back door. Then set up distinct areas, or “zones,” for each set of activities. For convenience and safety, try to keep zones from overlapping — the refrigerator, for instance, should be at the outer corner of the cooking zone so that kids can access it without having to pass near the stove.
The good news is, you should be able to recoup most of your remodeling costs at resale. The bad news: You have to pay for it now. Limit spending to no more than 15 percent of your home’s market value. Then, once you’ve come up with a budget number, lop 20 percent off the top and squirrel it away for unexpected necessities — like shoring up the floor so that new cast-iron Aga stove doesn’t go crashing into the basement.
Cutting Costs Without Cutting Corners
One Simple Exercise That Can Save Big Bucks
One of the surest ways to shave costs is to do more with what you’ve got. So before taking the sledgehammer to your existing kitchen, try this: Empty every drawer and cupboard. Revisit where you’ve been putting things. Is there an organizational scheme that makes more sense? Think in zones, storing items closest to where they are used. “In the end,” says architect Dennis Wedlick, “you may like the reconfiguration so well that you’ll decide to just paint and stick with the kitchen you’ve got.” And if you do go forward, you’ll have a clearer sense of how you really use the kitchen, which will help save time and money on the redesign.
Five Things that Really Matter When Shopping for Appliances
Call it the Emperor’s New Stove. Today’s appliances are jam-packed with features, but don’t let all those bells and whistles fool you. When comparison shopping (which you really should do, since prices for the same item can differ by hundreds of dollars), pay particular attention to these five things:
1. Burner heat output (in Btu): Ideally, you want a combination of high highs and low lows. A standard burner goes from a low of around 2,000 Btu to a high of 12,000. Pro-style models can pump out 15,000 Btu or more to boil pasta water in a flash, but ease down to a low of 400 for gently simmering sauces.
2. Energy efficiency: Look for dishwashers and refrigerators that have earned Energy Star ratings (energystar.gov). You’ll save money on operating costs as you conserve resources.
3. Ease of operation: Easy-to-grip stovetop knobs, accessible refrigerator controls, convenient dishwasher loadability: The little things mean a lot.
4. Safety features: Choose a cooktop with controls at the front or side, not between burners, and click-and-turn knobs that kids can’t light by mistake. Don’t skimp on ventilation: The mightier the stove, the more powerful the range hood required. And be sure your design plan includes plenty of GFCI (ground-fault circuit interrupter) outlets to avoid the use of extension cords.
5. Ease of cleaning: Options like sealed stovetop burners, sliding tempered-glass refrigerator shelves (not drip-through grates), and fingerprint-resistant textured finishes reduce cleanup time.
Four Budget Balancing Scenarios
1. You love the look of stainless steel appliances, but not the price tag. Near-record prices for stainless steel drove the cost of pro-style appliances up as much as 10 percent last year, according to the Wall Street Journal. A 36-inch pro-style dual-fuel range now runs $6,000 or more. Affordable alternative: Get the look by installing a six-burner pro-style cooktop ($800?$2,500) and a pair of mid-range wall ovens (about $1,500). Save $2,000 or more.
2. You really need more storage space, but you plan to move in a few years and would rather not invest in custom cabinets. Custom-crafting every nook and cranny for the way you cook may not be the most economical use of your dollars when someone else—with different cooking and lifestyle habits—will be living in your kitchen before the home-equity loan is paid off. Affordable alternative: Consider working a walk-in pantry into your plan. It’s a remarkably economical way to upgrade your kitchen—a pantry can supply as much storage as a wall or more of custom built-ins. Save as much as $1,100 per linear foot.
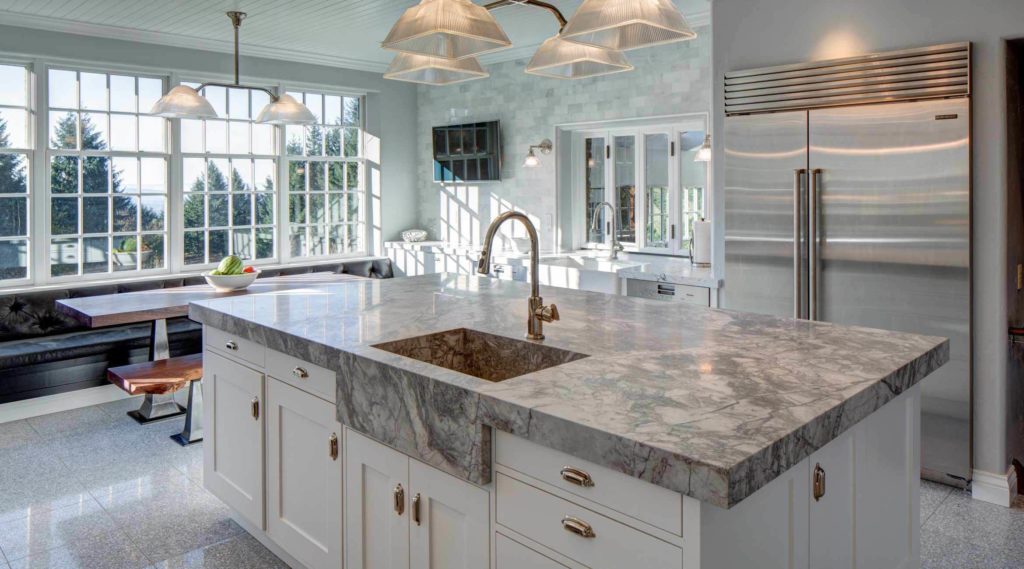
3. You want granite countertops, but they’ll bust the budget. Granite’s resistance to moisture, scratching, and high heat makes it a perennially popular (if pricey) choice. Affordable alternative: If you love the look of granite—or soapstone or marble or handcrafted tile for that matter—work it into your plan. But instead of using it for every countertop, try limiting it to a high-visibility island or to the areas flanking the range. Elsewhere, use less expensive options like plastic laminate or ceramic tile. Mixing also adds visual interest. Save $150 or more per square foot.
4. You want a lighter, brighter kitchen, but knocking down walls just isn’t an option. The space may be drab and dingy, but it gets the job done, and a major overhaul isn’t in the budget right now. Affordable alternative: Sometimes a well-planned lighting scheme is all it takes to brighten a kitchen. Spend the bucks for the services of a professional planner or lighting designer. That plus simple cosmetic upgrades, such as a fresh paint job, new cabinet hardware, upgraded counters or flooring, and a couple of new appliances can totally transform the space. Save untold thousands by sticking to the original layout.

Avoiding the Most Common Mistakes
In a perfect world, demolition starts on time, deliveries arrive on schedule, installation takes place without a hitch, and cleanup is quick and easy. Chances of all that happening are slim enough; don’t shrink the odds by falling prey to these common pitfalls.
1. Trying to be your own GC. Trust us: This is one job you don’t want to undertake. A kitchen remodel is one of the most costly, complicated, and time-consuming projects imaginable, and the input of qualified professionals is not only valuable, in most parts of the country it’s mandated by law.
2. Hiring the wrong GC. Never hire a contractor who makes you uncomfortable, no matter how highly recommended or how low the estimate. If you feel like the contractor is someone you can’t trust, keep looking.
3. Putting the job out for bid without clear enough specs. Unless you account for every detail of the project up front, you won’t be comparing apples to apples when you solicit bids. That means specifying the type of flooring, countertop material, lighting, even cabinet hardware. If you don’t, a contractor might assume higher-end choices (which may be more difficult to install), and you could end up overpaying.
4. Paying in advance. It’s shocking how often normally intelligent people turn over a sledgehammer and their life savings to someone they just met. Never pay more than 30 percent of the total job cost up front (typically to cover startup materials). Then work out a schedule of progress payments based on the completion of predetermined phases of the job.
5. Getting distracted from your ultimate goal. Have you ever made a run to Lowe’s to pick up a plunger and some window screening and come back with $200 worth of tools and gadgets you didn’t really need? The same goes for kitchen remodels. “There are so many toys out there,” says architect Dennis Wedlick. “That’s why it’s essential to make a wish list—and to stick to it.”
6. Trying to keep up with the Joneses. If frozen pizza is all you ever pop in the oven, a conventional stove will serve you just as well as that newfangled induction range — and save you thousands of dollars besides. You can always upgrade appliances later.
7. Settling for a cookie-cutter kitchen. Let’s face it: The next owners of your house will start dreaming of ripping out your fantasy kitchen as soon as they move in. Unless you’re planning to move within the next couple of years, go ahead and build the kitchen that works for you and your budget. But be careful not to overcustomize. What’s perfect for you today (built-in seating for the kids—who will soon be too tall to use it) may prove limiting tomorrow.
8. Ignoring what you can’t see. Everyone worries about the cabinet faces, but if the sides and hardware aren’t made of sturdy enough stuff, the doors will be crooked in no time. And those gorgeous concrete or tile countertops are sure to crack if they’re not installed on a strong, level base. Don’t be seduced by surfaces: It’s what’s behind the walls and under the floors that really counts.
9. Changing your mind—again. Time is money. That’s what Benjamin Franklin advised tradesmen way back in 1748, and indecisive homeowners would do well to heed his warning. Regretting, reordering, reconfiguring—it all leads to delays, changed work orders, and tapped-out budgets. It also tests the patience of your contractor, who’s got another job lined up after this one.
10. Living with a dysfunctional space because remodeling is a hassle. Life’s about thriving, not just surviving. Just think, with a little time and effort, you could have the kitchen you’ve always wanted. Not to mention a few (happy) remodeling stories of your own.
Article Source: ThisOldHouse
21 Ways to Save On Your Home Addition
We canvassed dozens of industry pros to catalog ways you can wrestle your renovation costs back down to earth.
3. Hit the recycling center.
Do–it–yourselfers can reap big savings with recycled or lightly used fixtures and building materials. Habitat for Humanity operates about 400 ReStores nationwide, which offer salvaged materials at half off home–center prices. One caveat: Many contractors won’t work with salvaged items, or homeowner–supplied materials in general, because they don’t want to assume the liability if something goes wrong. That said, if you’re doing your own work, you can find anything from prehung doors to acrylic skylights to partial bundles of insulation. (To find a ReStore near you, visit habitat.org.)
Price of 4–by5–foot insulated window in a home center: $600
Price at ReStore: $300
SAVED: $300
4. Donate your trash.
Before you begin a remodeling job, invite the local Habitat for Humanity chapter to remove materials and fixtures for later resale. “About 85 percent of a house is reusable,” says B.J. Perkins, Habitat’s ReUse program manager, in Austin, Texas. “We can do a total takedown, or do a cherry-pick job and take the cabinets, the tub, the sink, and so on.” You save space in the landfill, collect a charitable tax credit for the donation, and help a good cause. Visit Habitat’s website (see Way to Save #3) to find an affiliate near you.
Cost to trash a suite of bathroom fixtures: $50 to $75
Cost to donate: Nothing, plus you get a tax deduction
SAVED: Space in the landfill (and a little bit of your soul)
5. Do your own demo.
Knocking down may not be as costly as rebuilding, but you can still shave dollars by doing some of the demolition yourself—as long as you proceed with care. “If a homeowner wants to demo a deck, well, I am sure they can handle that,” says Michael Winn, owner of Winn Design, in Virginia. “But when it comes to interior spaces, I would dissuade them from doing it unless they have done it before.” The reason: A reckless wrecker might unwittingly take out a load–bearing wall or, worse still, plunge a reciprocating saw into live wiring or pressurized plumbing. (For tips on how to do demo right, see our October 2005 feature, “Before You Construct, You Have to Destruct.”)
Cost to demo a 200–square–foot deck yourself: $450 (Dumpster rental and parking permit)
Cost for a pro: $1,000
SAVED: $550
![]()
6. Consider long–term costs, not just short–term gains.
If your addition calls for clapboard siding, for instance, you can save more in the long run by ponying up now for the preprimed and prepainted variety. It costs an extra 10 to 20 cents per foot, but “you’ll wind up paying for half as many paint jobs down the road,” says Paul Eldrenkamp, owner of Byggmeister, a design–build remodeling firm in Newton, Massachusetts. The reason? Factory finishes are applied on dry wood under controlled conditions—no rain, no harsh sun. “I used prefinished claps on my house about ten years ago and the only flaw in the finish is the occasional mildew spot, easily washed off,” Eldrenkamp says. “The paint looks as if it’ll be good for another ten years, easily.” Cost of unfinished siding for a 10–by–40–foot addition, plus two paint jobs: $5,000
Cost for prefinished claps and one coat of paint at installation: $3,750 SAVED: $1,250
7. Tap your contractor’s sources.
When it comes to things like flooring, ask your subcontractor if he has odds–and–ends stock left over from other jobs. While renovating a Civil War–era bed-and-breakfast in New Jersey some years back, contractor Bill Asdal needed wood flooring. He made a few phone calls and came up with hundreds of square feet of hardwood, in various lengths and widths, that otherwise would have gone into the trash on other job sites. Just by planing it to uniform thickness, then sanding and refinishing it, he saved his client almost $9,000 in materials costs.
Cost of new flooring: $19,200
Cost to use someone else’s discards: $10,500
SAVED: $8,700
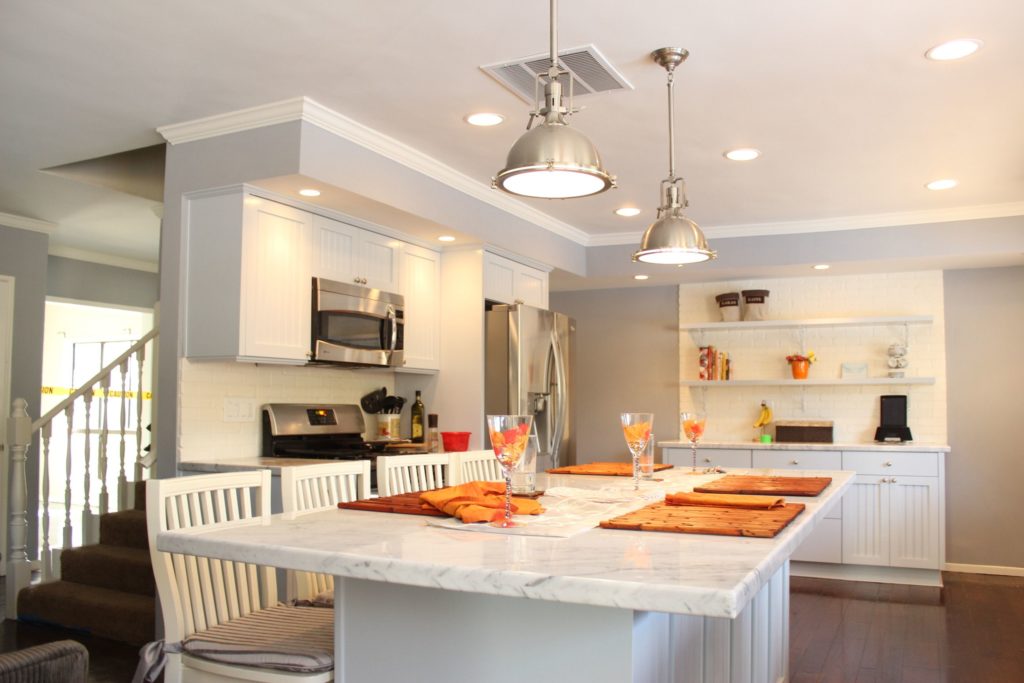
8. Limit recessed light fixtures.
“The more recessed lights you put in, the more it’s going to cost,” says Tom Silva, This Old House’s general contractor. In addition to the fixtures, there’s the labor to cut all the holes and insulate them properly. A wall– or ceiling–mounted light can also deliver more wattage, which means you may be able to get away with fewer fixtures.
Cost to install six can lights: $900
Cost to install one surface–mounted fixture of equal wattage: $300
SAVED: $600

9. Consult an architect.
Depending on the scale of your project, you might not need a full–on architectural commission, which involves extensive meetings, multiple job–site visits, and several sets of construction drawings, to the tune of about 8 percent of a project’s construction budget. You might be able to tap an architect’s design savvy by having him undertake a one–time design consultation. For example, for a $400 flat fee, Baton Rouge architect Kevin Harris will meet with a homeowner, examine the problem, and sketch out a few solutions that could be as simple as opening up a partition wall or moving a door. The homeowner can then give the sketch to a builder or take it to a drafting service, which will charge about $1 to $1.50 a square foot to crank out formal construction drawings.
Architect’s fee to design a 300–square– foot home office: $2,250
Fee for design consultation only and plans: $580
SAVED: $1,670
10. Partner with a contractor.
Though the practice is controversial among the trades, some contractors will offer consulting and mentoring services to skilled do–it–yourselfers on an hourly basis. Chicago–area builder Ted Welch charges $150 per hour for such coaching, with a two–hour minimum commitment. “The most satisfied clients tend to be those who have good manual dexterity, who realize that skills need to be practiced in order to be perfected, and who are willing to risk making a few mistakes and then learn from them,” he says.
Cost to drywall one room: $1,000
Cost with DIY consultation: $300 (2 hours of coaching), plus materials
SAVED: $700
11. Make sweat equity count.
Unless you’ve got loads of time (and expertise) to spend on your project, the best way to add sweat equity is up front, by handling your own demolition, or at the back end, by doing some of the finish work yourself. “If you want to save money, dig in and start helping out,” says Tom Silva. “You can insulate, you can paint, you can sand.” Or better still, he says, help with cleanup every day. “Instead of paying someone to pick up sawdust off the floor, put your money into the time it takes to trim the window properly,” he advises.
Cost for construction crew to handle cleanup: $200 per day
Cost to do it yourself: $0
SAVED: About 3 to 5 percent of the overall job cost
12. Do your own schlepping.
If you’re doing your own project, slash your materials–delivery fees by picking up goods yourself. No pickup truck? For about $400, you can purchase a nearly new single–axle utility trailer online, which you can tow behind your SUV. Get one just big enough to carry 4–by–8 sheet goods flat. Use it for a half–dozen trips, and it’s paid for itself. Find trailers for sale near you via eBay Motors, or try your local classifieds.
Cost of 10 deliveries: $750
Cost to buy a used trailer: $400
SAVED: $350, plus you get to keep (or sell) the trailer
13. Don’t overspend on wall prep.
If your walls are in such rough shape that it would take a painting contractor days of filling and sanding to make them ready for the roller, consider using materials such as Texturglas, from Deerfield Beach, Florida— based company Roos International. A breathable, nontoxic wall covering made of fine glass filaments, Texturglas has a similar look and feel to the fiberglass matting used in auto–body work. It’s available in a variety of surface patterns, takes paint readily, and is designed to be installed right on top of existing surfaces, adding strength while covering up dings.
Cost to patch and paint a 15–by–20–foot room with heavily damaged walls: $1,525
Cost to install Texturglas:$1,050
SAVED: $475
14. Consider look-alikes.
Some imitations just make sense: Lumber giant Weyerhaeuser sells a fast-growing natural eucalyptus hybrid under the brand name Lyptus. Sustainably harvested in plantations in Brazil, the clear-grained hardwood looks and feels remarkably like mahogany. It’s sold as toungue-and-groove flooring and in planks and sheets for cabinetry and millwork.
Cost of 100 board feet of mohogany: $808
Cost of same quantity Lyptus:$395
SAVED: $413
15. Demolish the whole house and start from scratch.
“Most clients don’t want to hear those words,” says Paul Irwin, design director with Landis Construction, in the Washington, D.C., area, “but it really needs to be considered on major remodels.”In one case, for example, plans for a 1,300–square–foot addition revealed that the house’s existing foundation wasn’t up to code and would have to be replaced—a $30,000 proposition. After crunching the numbers, the owners concluded that it would cost as much to update the house, a former summer cottage, as it would to reproduce it new. “For a relatively small additional cost,” says the owner, “we get all the benefits of new construction while preserving the character and feel of our old house.”
Cost to remodel: $570,000
Cost to replicate: $588,000
SAVED: For $18,000, the owners gained as much as $60,000 worth of new living space, plus improved safety and energy efficiency.
16. Wait until contractors want your business.
Don’t schedule your reno in the height of summer or between September, when the kids go back to school, and Christmas. “That’s premium time,” explains Lisa Stacholy, owner of LKS Architects, in Atlanta, Georgia. Suppliers tend to be busier, labor scarcer, and deliveries slower. One Virginia–based contractor offers discounts of between 4.5 and 5.5 percent (depending on the overall budget) on projects during his down time, right after the new year.
Cost of a major bathroom remodel in peak season: $25,000
Cost in January: $23,625
SAVED: $1,375
17. Skip the foundation.
If local code allows, you may be able to support a small addition on posts and beams, as you would a deck, explains contractor Dennis Gavin, of Gavin Design–Build, in Media, Pennsylvania.
220–square–foot addition with poured foundation: $40,000
Same–size addition on posts and beams: $35,000
SAVED: $5,000
18. Don’t move the kitchen sink.
Or the toilet, if you can avoid it. “That often becomes the biggest part of the plumbing–price increase,” says Richard Trethewey, This Old House plumbing and heating expert. If your new layout requires that you move the toilet, use the opportunity to upgrade the pipes at the same time. “That will save you money in the long run,” says Richard.
Cost to move toilet more than 3 feet: $500—$1,000
Cost to leave in existing location: $0
SAVED: Up to $1,000
19. Plan with stock sizes in mind.
“Ask yourself, ‘Why am I building something 10 feet wide if plywood comes in 4–foot–wide sheets?'” says Lisa Stacholy, of LKS Architects, in Atlanta. The same applies to stock windows and doors: Use manufacturers’ off–the–shelf dimensions from the outset and you will save the premiums of custom fabrication. Cost of custom doors: $1,500—$2,500
Cost of standard doors: $500–$800
SAVED: Up to $2,000
20. Buy building supplies at auction.
Brian Peppel, a homeowner in Phoenixville, Pennsylvania, attends one building–supply auction each month in nearby Lancaster County. His recent finds include two pallets of concrete block for $10 and a solid–wood prehung exterior door for $65. “Their inventory is everything under the sun, a lot of scratch–and–dent, misordered custom items, or new overstock supplies,” reports Peppel. He once watched the auctioneer’s gavel fall on a large, custom–made triangular window with an original retail value that he pegs at several thousand dollars. The winning bid? $1.
Cost of solid–cherry wall cabinet at a home center: $300
Cost at building–supply auction: $10
SAVED:$290
21. Make decisions early.
Start prowling the aisles at the hardware store or home center way before the wrecking crew shows up. Get a good feeling for what you want in fixtures and appliances and what they cost. If you aren’t absolutely specific up front about what you want, you’ll have to rely on your contractor’s estimate, called an allowance, and his notion of what is acceptable may be quite different from yours. “Ninety–eight percent of the time, allowances are too low,” says Tom Silva. For instance, you may have had a glass–tile backsplash in mind, but your contractor’s bid was for ceramic.
Cost to plan ahead: $0
Cost of change orders midstream: The difference in the item price, but also time lost to project delays and communications glitches
SAVED: Up to thousands
Article Source: ThisOldHouse
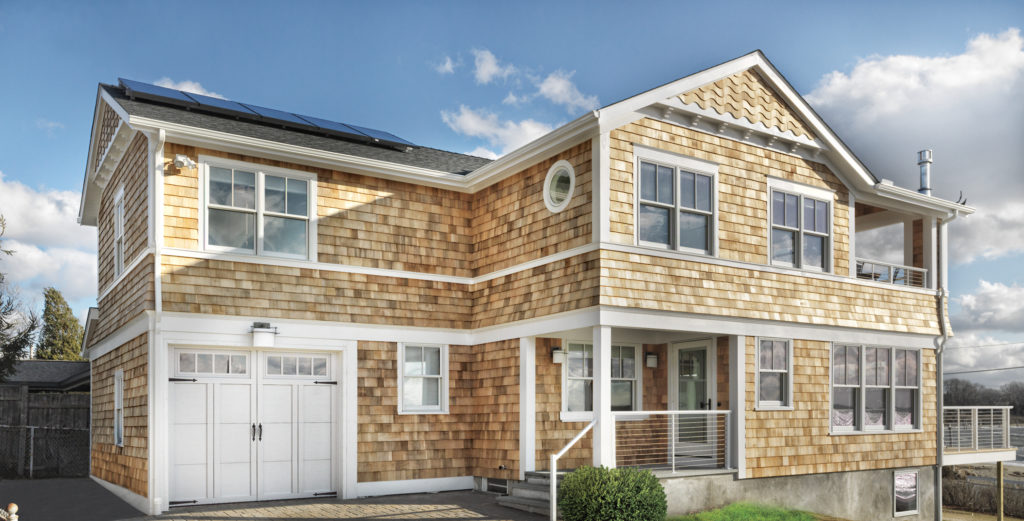
 Adding An Attached Garage: What To Consider
An attached garage can be very useful. It offers you a way to protect your vehicles and any yard equipment. It can also raise the resale value of your home by a considerable margin. There are, however, some important things to consider when looking at the option and potential costs of adding an attached garage.
Things to Consider
If you are thinking about building an attached garage onto your home, it is important to take a few steps in preparation. Figuring on realistic prices is important but before you begin this process you should first consult with your local government. Most cities will allow the addition of an attached garage but there are some which prohibit such additions. Verify that the job can be done legally before you take any further steps.
Figuring Out the Cost
Dimensions
The overall dimensions of an attached garage will be the single biggest factor in determining how much the job will cost. The larger the garage will be the more it will cost.
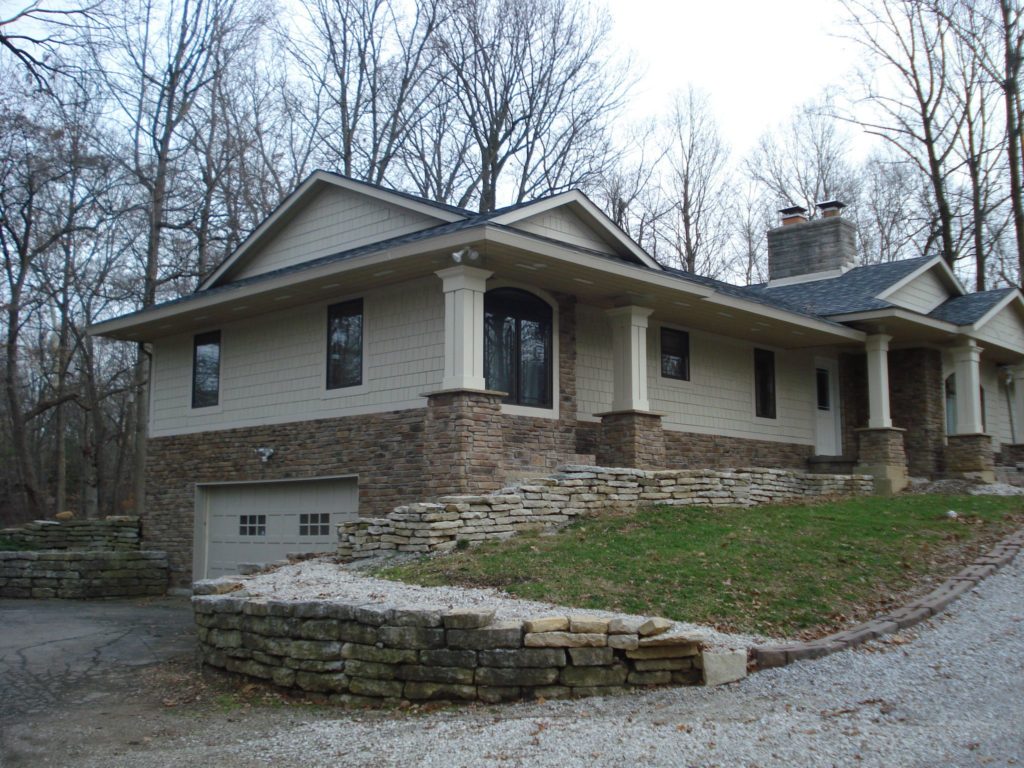
House Style
The design of your home can play a big role in the cost. As an example, a 2-story house is often cheaper to add an attached garage to because it rarely involves modifying the roof. Many single-story homes require roof modifications in order to properly accommodate the new garage.
Number of Cars
The size of the garage does not necessarily need to be based on the number of cars which will be stored in it but by the number of garage doors it has. The size, type and number and type of garage doors will play into the price. Using aluminum garage doors is a good way to save some money.
Homes Building Materials and Style
The building materials and style used in the home can play a major role in the cost. While you do not necessarily need to stick with your home’s design it often leads to a more unified addition. If your home is brick or block and you wish to continue the exact look into your new garage, the addition will cost you more money.
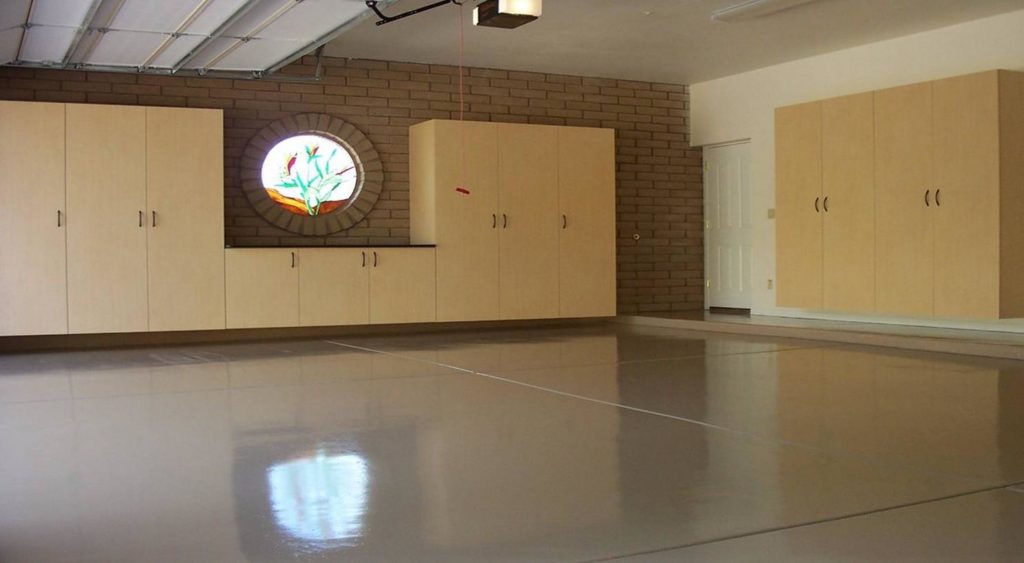
Additional Potential Costs
There are many other potential additions that can be made to an attached garage. Some of these include windows, electrical, plumbing, insulation and work areas. When figuring on a cost, get estimates for each option from multiple contractors. f
Build a list of all of the materials you will be using. This should include materials such as wood, bricks, plywood, roofing wood, tar paper, shingles, windows, electrical wiring, plumbing and any other materials you will need for your garage. Once you have this list determine how many of each you will need by taking the total size of the garage and dividing it by the dimensions of each material. In the case of 2 by 8s for framing you must remember that these need to be spaced at 16 inches off center. Finally, contact local hardware and supply companies and get prices on these different materials and add it up.
Garage Vent Installation Tips
What to Know About Working With a Custom Woodworker
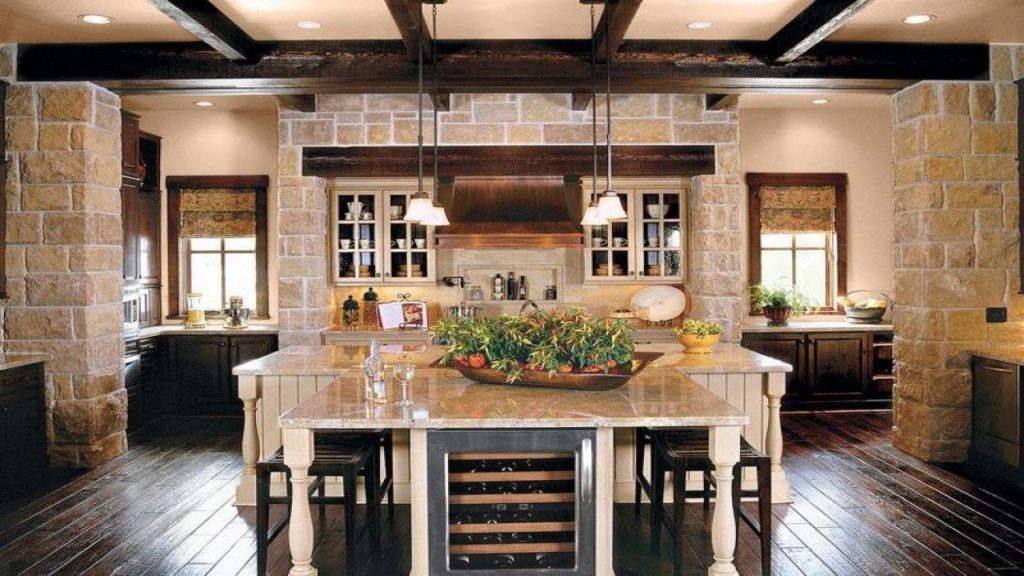
Q. Why should homeowners consider going the custom route rather than buy off-the-shelf stock cabinets?
Lisanti: The two biggest factors for choosing custom are attention to detail in the design phase and having the ability to seamlessly match millwork, trim or furniture pieces with the custom cabinetry. True custom cabinets offer customers the ability to have complete flexibility in their project designs. Special sizing constraints, uncommon wood types or finishes, and complicated design elements are not an issue when choosing a custom cabinet and millwork shop.
Braam: When you order stock cabinetry, you have to stick to standard cabinet sizing, and the fillers accommodate any unused space. This limits your choices in many ways and creates a lot of unused space that you won’t run into if you go the custom route. Custom guarantees that your designer is always working with a fresh, new perspective and you’re getting something uniquely you.
Berg: From a product standpoint, custom shops use superior materials, hardware and construction methods. You will pay a bit more, but they will stand up to wear and tear, whereas the cheaper materials and hardware used in many off-the-shelf cabinets will break down much faster. For instance, a soft-close drawer slide may work fine for the first year or so, but we’ve gone into many homes and seen the compression piston fail, which results in a faulty slide.
From a customer service standpoint, custom shops should take more time in the planning process to ensure your new cabinets do more than fill the space with storage, but also reflect your style and plans for how you intend to use your space.
Q. What can custom cabinetmakers do? Many folks immediately think of kitchens, but I know there is a lot more to it. What other sorts of projects have you worked on?
Berg: We’ve worked on projects ranging from furniture-style bathroom vanities to swinging bookcases that conceal hidden rooms, arts and craft rooms, master closet organization and storage, custom-tailored wine cellars, breakfast nook built-ins, laundry rooms, bookcases, and dining tables and sideboards.
Braam: It’s true that we do mostly kitchens and baths, but we also do entertainment and wall units, fireplace surrounds, wall and ceiling paneling, furniture, home offices, closets, bars and beverage centers, pantries, laundry rooms and mudrooms, to name a few.
Q. Are there technologies you use (design rendering etc.) that can help clients visualize the result? Something clients wouldn’t get with ready made?
Berg: We use several types of design and manufacturing software. One is primarily used for giving clients detailed floor-plan and elevation views of their project, while simultaneously generating cut parts for all of the cabinets. This software also enables us to create photorealistic renderings for our clients. The second is used for drafting more complex projects which require further detail.
Braam: We use a cabinetry program called CabinetVision, which allows us to render elevations and 3Ds in full color for clients. The program also allows us to rotate the room to allow the client the ability to get a good feel of the 3D space. They are able to see all details to the millwork, detailed crown molding or glass-door mullions. In addition, we have a skilled cabinet engineering team that collaborates with the designers to help get any creation from design into the computer accurately — helping for your vision to really come to life full circle.
Metzler: We use a 3D rendering software called KPS, which is a version of Planit developed in Germany that includes our catalogs already inside the software. This can show what our kitchens would look like and also generate a detailed item list with pricing.
Q. What about your pricing structure? Do you charge hourly, by the project or some other way?
Berg: We have a general pricing structure based on lineal footage for standard cabinet runs: bases, uppers, full heights. This price varies based on the cabinet construction method — frameless, inset face frame — and wood species. Upgrades are applied for things like exotic wood species, hardwood dovetailed drawer boxes, custom glazed or distressed finishes, and radius doors and moldings.
Braam: We charge by the project. The thing about custom is that it’s not accurate for us to ballpark a figure for a project. It’s easier to work within a client’s budget and make a list of what is most important to be included. Material costs, labor and finishing can vary greatly depending on what the client chooses.
Q. What should potential clients know before hiring a custom cabinetmaker?
Lisanti: As when hiring any professional to work in your home, do your homework. When you meet with the owner or salesperson of the custom cabinet shop, try to get a feel for his or her passion about their craft and ability to provide you with what you are looking for. Also try to set up visits to some of their recent projects. From my experience, most past clients who are pleased about the way their projects turned out are usually more than willing to allow potential clients in to see it and offer up a great referral.
Q. How can homeowners know if a cabinetmaker is well qualified? What should we be looking for?
Braam: Most kitchen designers have completed either an interior design or decorating program at college or university. This provides the designer with the fundamentals for space planning, millwork, materials and colors.The homeowner can look at the years the company has been in business in the community; the more years in business, the more experience in the industry.
Lisanti: Look for a passion and attention-to-detail quality of the owner/operator. Also referrals, photos, scheduled site and/or shop visits, and accreditation are good signs of a professional.
Braam: Accreditation and affiliations such as the National Kitchen & Bath Association, local Home Builders Associations and the Better Business Bureau can also help a homeowner feel confident in their decision. Homeowners should do a bit of research prior to working with one company. Ask around to friends or families to see who they used for their cabinetry and what their experience was like.
Your Content Goes Here
Your Content Goes Here
Your Content Goes Here
Your Content Goes Here
Your Content Goes Here
Your Content Goes Here
Your Content Goes Here
Your Content Goes Here
Your Content Goes Here
Your Content Goes Here
Your Content Goes Here
Your Content Goes Here
Your Content Goes Here
Your Content Goes Here
Tony’s Trusted Partners
With all the years of quality work and experience comes the opportunity to work with many Trusted Partners. Tony has had the opportunity to align himself with some great Associations and Organizations! Feel free to check them out.


Get A FREE Quote Today
It’s easy! All you have to do is fill out the form below, and we will contact you with a quote.